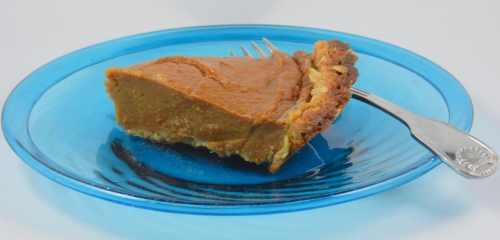
Posted by: njbrown | June 15, 2013

Bar Harbor, Maine – Lobster and Blueberries


bar harbor 2 2013-05-30 20.07.09

Bar Harbor, Maine

After leaving Nova Scotia and a night in St. John, N. B., we drove to Bar Harbor, Maine. Bar Harbor had been highly recommended by both sides of our family, and having loved the covers of L.L.Bean catalogs in the years that they had paintings of Maine, I was looking forward to seeing Acadia National Park on Mt. Desert Island with Bar Harbor. We arrived in the rain, and were told by hotel staff that it had been raining for two weeks. Our harbor view room at the beautiful West Street Hotel had a view of fog.   However, the next morning, the sun came out and began to burn off the fog and lovely islands were revealed.

Jordan Pond House Restaurant

Jordan Pond House Restaurant

We left for the Park early to be sure to get a table at the Jordan Pond House Restaurant there.

Jordan Pond House Popover

Jordan Pond House Popover

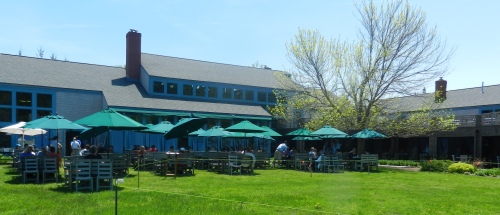
The Jordan Pond House Restaurant is known for its delicious popovers. Pretty tables with market umbrellas dotted the lawn overlooking the water with twin peaks beyond. The weather was perfect, and the staff very attentive.

Lobster Quiche

Lobster Quiche

George opted for a lobster quiche that he loved, and I had a very nice salad. True to our recommendations, the popovers were excellent, although I’m not a huge popover fan.

Blueberry Crumble

Blueberry Crumble

For dessert, we chose blueberry crumble. Maine is known for its tiny, sweet blueberries, and this dessert was full of them. George would have liked a bit more crumble, but I thought it was delightful.

View from top of top of Cadillac Mountain

View from top of top of Cadillac Mountain

After lunch, we drove to the top of Cadillac Mountain in the Park and saw the most spectacular scenery of the trip – high mountains, beautiful ocean, and many evergreen covered islands. An unexpected benefit was that we qualified for a seniors’ lifetime pass to any national park ($10 and it covers both of us).

Four-masted Schooner: Margaret Todd

Four-masted Schooner: Margaret Todd

Later, George spent two hours on the four-masted schooner Margaret Todd out of Bar Harbor, and had a wonderful time talking with the captain and crew.

Dinner that night was in a rustic seafood restaurant on the wharf, and for the first time, I saw outdoor kettles steaming in wait for lobsters. The restaurant menu said many scientists think lobsters don’t feel pain due to their primitive nervous systems, but the jury is still out for me.

The next morning was again lovely and sunny, and we began the final leg of our trip home through Vermont and upstate New York. Bar Harbor is definitely on our list for another visit

Four-masted Schooner: Margaret Todd

Four-masted Schooner: Margaret Todd


We arrived in Halifax not knowing what to expect. We found it to be a vibrant city (about 500,000) with one of the best and busiest ports in the world and a long history of shipbuilding. Samuel Cunard, of Cunard Lines, was born in Halifax, and decided toward the end of the age of sail that people would want to travel long distances by steamship. His vision made him a very wealthy man.

Halifax Harbour

Halifax Harbour

Halifax harbor is so deep that it never freezes. During WW II, all of the convoys heading to Britain formed in Halifax. Today, Halifax is the site of huge container shipping operations as well as fishing.

Maritime Museum

Maritime Museum

The Halifax wharf area is delightful, and we really enjoyed the Maritime Museum. (George was doing his compulsory military service in the Navy when we met. Much of our courtship was spent on or around the water in Newport, R. I. George comes from a family of sailors, so this “bucket list” trip for him had a clear focus on water – preferably ocean.) There are numerous seafood restaurants, and while we didn’t have any meals that were spectacular, all were good.

We had decided to use Halifax as our base and take two day trips – the first along the “lighthouse trail,” and the second to Annapolis Valley and Nova Scotia’s eastern shore on the way to the ferry from Digby to St. John, New Brunswick.

Peggy's Cove

Peggy’s Cove

On the lighthouse trail, we had to see Peggy’s Cove – the place everyone associates with Nova Scotia. I hadn’t realized that Peggy’s Cove is set on 20,000 year old rock formations that make it unique in my experience.

Seafood Chowder in Mahone Bay

Seafood Chowder in Mahone Bay

From Peggy’s Cove, we drove on to Mahone Bay and then to Lunenburg – home of the famous racing ship and fishing vessel, the Bluenose – holder of the International Fishermen’s Trophy for seventeen straight years. Both Mahone Bay and Lunenburg are charming with a number of 18th century homes.

Before I moved to Canada, the only Annapolis I knew was the one in Maryland. During the Revolutionary War (or the War for Independence as they call it in the States), many people loyal to the British Crown moved quickly to Canada. The Annapolis Valley is known for its beauty, and it truly was gorgeous. Although the apple trees had passed their prime, there were still many blossoms, and the lilacs and cherry trees were in bloom.

Annapolis Royal is the site of the first Loyalist home. Fort Ann is a beautiful white building that looks more like a stately home than a military building, and it is set on a gorgeous bluff overlooking the Annapolis Basin. Annapolis changed hands between the British and French seven times before finally remaining British. Annapolis Royal is very small, and the main street only a few blocks long, so it can be seen in a short visit.

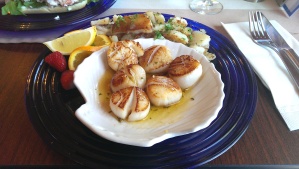
Scallops in Annapolis Royal

Scallops in Annapolis Royal

We had a very nice lunch in Annapolis Royal at the Restaurant Compose. Digby is a major scallop fishing center, and I decided I couldn’t pass up a chance to have scallops hopefully straight from the boat. They turned out to be delicious, and they were served with fried sliced potatoes. As a child, I loved my mother’s fried potatoes with their crunchy crust, and these were as good as hers, but I rarely find them since. The French make Pommes de Terre Anna that takes longer, and looks nicer with the concentric rings of sliced potatoes, but because when I last made it, the potatoes were layered with clarified butter and the resulting dish made more than was good for the two of us, I hadn’t done it since. I think it will be a future blog.

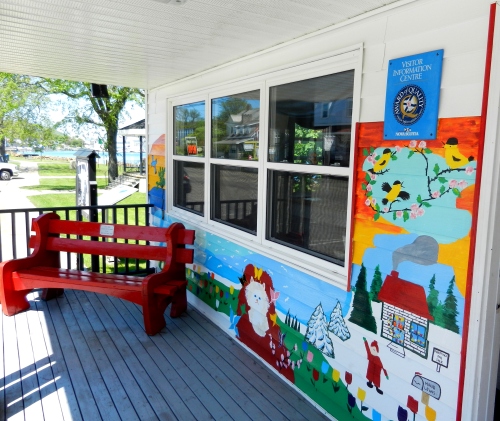
Information Centre à la Maud Lewis

Information Centre à la Maud Lewis

On our way to the ferry between Digby and St. John, N. B., we made a brief stop at an information center in Digby that was painted with charming primitive scenes of people and animals. The lady in the center said that famous Canadian primitive artist, Maud Lewis, had lived in Digby. She was very crippled from juvenile rheumatoid arthritis, but covered the inside of her tony home with her marvelous paintings. Her entire home is now in the art museum in Halifax for people to enjoy. I definitely want to see that the next time we are there.

The ferry trip took three hours to cover the forty-five miles across that part of the Bay of Fundy. The Bay of Fundy is famous for its radical changes in depth with the tides (up to 32 feet in six hours). Similar to Mt. Saint Michel in France, when the tide goes out, it goes very far out, and you can walk along the ocean floor in Digby for 3 kilometres.

We finished our time in Nova Scotia with lovely memories, and a few additional pounds.

Posted by: njbrown | May 29, 2013

Eating in Cape Breton – Or Not


In this blog, I try to avoid negative comments, but George said I needed to blog our eating experiences on the Cabot Trail of Cape Breton Island.

Cabot Trail

Cabot Trail

Friends had encouraged us to drive the Cabot Trail (Canada’s equivalent of the Amalfi Coast), and George really wanted to see what had been described as spectacular ocean views from the high and steep mountains that run down to the sea.  From our guidebooks, it looked as though food would be available on the six-hour trip from the beginning of the Trail, through the highlands to Louisbourg where the French had a thriving colony in the early to mid 18th century.  Weather is unpredictable, and fog can close in rapidly, obscuring the views and making the hairpin turns even more hazardous.  By a great stroke of luck, the day we had chosen for the drive turned out to be sunny.

Pleasant Bay on the Cabot Trail

Pleasant Bay on the Cabot Trail

At the half-way point in the Trail (Pleasant Bay) was a small motel with a very small restaurant.  The lady who served us was married to a lobsterman who docks his boat closeby.  George ordered lobster, and found it to be excellent and very reasonably priced.  Still recovering from eating too much Quebec City food, I opted for seafood chowder.

We completed the drive late in the afternoon and arrived in the town of Louisbourg to find that our motel was attached to an RV park.  Things went downhill quickly from there.  We “upgraded” our room for one with an ocean view, but as we unpacked the fog rolled in and we had a fog view for the rest of the stay.  The very pleasant lady at the desk told George that no place else in town was serving meals – the tourist season apparently begins in June.  The motel advertised “18th century dining,” and all I can say about the meal is that I didn’t know canned peas existed in the 18th century.  We had gone from the sublime in Quebec City to – words fail me.  To summarize, probably the best approach to eating in the Louisbourg area of Cape Breton before tourist season is a very well-stocked picnic basket.

Historic Lousibourg

Historic Louisbourg in the fog

The Fortress of Louisbourg National Historic Site was very interesting, although again, only a fraction of the buildings were open given that tourist season had not begun.  Built in 1713, the fortress had about 700 soldiers, and the town was built around it.  Approximately one quarter of the original buildings have been restored.   In 1758 as part of the Treaty of Utrecht, the French gave up Louisbourg to the English.  It’s been many years since I visited Colonial Williamsburg, and there are similarities and differences; both were capitals in their prime.

The next day, we arrived in Halifax – a city new to me – and we checked into a lovely boutique hotel where we were booked for three days.  I was ready for more comfort and more dining choices!

Posted by: njbrown | May 26, 2013

Eating in Quebec City


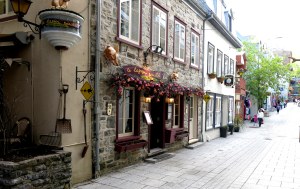
A forty-one year absence from Quebec City had made me forget how unique and wonderful the Old City (upper and lower) is. The tall, narrow stone buildings – often with walls two or three feet thick – are charming, and buildings dating from the 1600s are common. The Chateau Frontenac where we spent half of our honeymoon in 1972 is still a grande dame of hotels, but is in the process of renovation and, I fear, “updating.” I was glad to have been able to stay in the original version again.

It was beautiful when we reached the Chateau Frontenac, and we decided to walk longer and eat later than usual. Going out for dinner about 8 o’clock, we saw a restaurant advertising fondue a few doors away. Since we’d had fondue on our honeymoon, we decided to repeat the experience. Actually, I repeated the experience, and George had a more varied menu. The dinner was excellent, and the star of the meal was their crepe with “maple butter.” I’d never had maple butter before, and find maple sugar too sweet to enjoy, but this was wonderful. The server explained that maple butter has no butter in it, but is a reduction of maple syrup/sugar (I got into deep water when I asked about culinary terms). However it is done, it is smooth, creamy and just pleasantly sweet.

Street in Old Quebec City

Street in Old Quebec City

The next day, we decided we’d have to walk a lot after so much good food, so spent several hours looking in the shops, admiring the scenery of the St. Lawrence, and soaking up atmosphere. Lunch was in a building that dated from 1675.

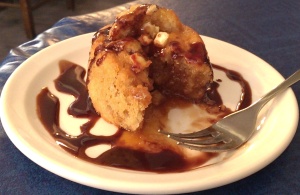
Apple Maple Cake

Apple Maple Cake

Again, everything was delicious, and my meal ended with an individual “apple maple cake” that seemed like a wonderful apple Charlotte. By 6:00, we weren’t terribly hungry, but knew we faced a long walk back to the hotel from the lower Old City.

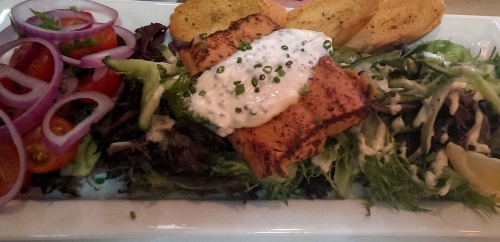
We passed several restaurants that didn’t seem quite right, and then turned down another small street and found the Bistro Sous le Fort. What a gem! It turned out to be our best meal so far on the trip.

Bistro Salmon 2013-05-21 18.26.12

Bistro Salmon Salad

We wanted simple dishes, but the menu also offered cutting-edge cuisine.  The salmon salad I ordered was a beautiful plate of two salads (with a subtle maple dressing), topped with a large portion of salmon dressed sauced with sour cream and chives. George had a hamburger that was perfect in every way.

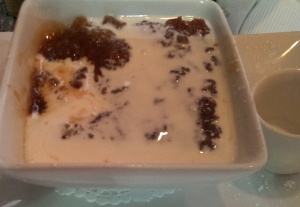
Maple Pudding

Maple Pudding

We hadn’t thought we’d have dessert, but once we looked at the possibilities, our resolve went out the door.  For dessert, George had the crème brûlée – perfectly torched, and I had an absolutely delicious and unique “maple pudding.” My expectation had been something that resembled butterscotch pudding in appearance and texture, but this was totally different. It was light, fluffy and almost cake-like in a wonderful, subtle maple sauce. The closest thing I could think of in my eating experience was Indian pudding, but the texture was much lovelier. A serving of heavy cream came to pour over the pudding. I tried to extract the secret of the recipe from our delightful server, Max, but he indicated that the chef (who wasn’t there at the time) wouldn’t give it away. He described making the pudding by pouring a maple mixture over some kind of dough. I left with many questions unanswered, but very impressed. If you are in Quebec City, run, do not walk to the Bistro Sous le Fort.

If you haven’t visited Quebec City, I’m sure you would enjoy it.  I don’t think it’s possible to have a bad meal there.


Day 1 of our trip focused on driving from Oakville to North Hatley, Que. where Hovey Manor (Manoir Hovey) is located. Hovey Manor has a wonderful history that I won’t try to summarize, but if you are interested, you can go to their website. Although we had made dinner reservations for 7 p.m. almost two months ago, the desk staff seemed perplexed when we arrived, and said 8:45 would be the best they could do for us. My stomach has never been tuned to late dining, and after some negotiation, George was able to get us a table at 7. The maître d’ was exceedingly gracious about the mix-up, and had us served complementary kirs.

Hovey Manor is a 4-diamond Relais and Chateaux “establishment,” and the food was worthy of the rating. The $70 table d’hote included many courses. To begin, we were given an amuse bouche of spring greens (including daisy buds, I think the server said), over which was poured a beautiful green cold soup.
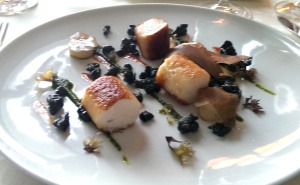
Scallop Boudin

Scallop Boudin

For an appetizer, I chose scallop boudin (a sausage), briar reduction, grilled kale, celeriac, spatzles and pickled Irish moss. There were other aspects to the dish, including “mushroom paper,” that I’d never encountered before. The “spatzles” were almost black, and the servers told me the color came from vegetable juice, and vegetable ash, but no one was able to give me more information than that. Obviously, the chef keeps some culinary secrets.
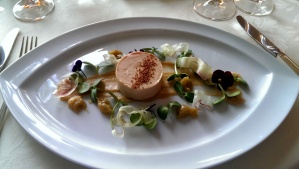
Foie Gras “En Torchon”

Foie Gras “En Torchon”

George chose foie gras “En Torchon” creamy maple syrup, camelina seed, wild rose brioche bread, and sun-flower rhubarb.
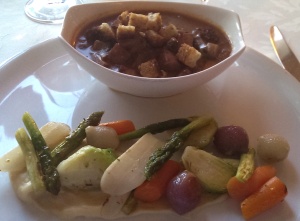
Tofu Bourguignon

Tofu Bourguignon

Trying to stay away from all food from creatures with eyelashes, I ordered the tofu bourguignon for my main course.

It was absolutely delicious!

I’m sure tofu is rarely elevated to that level.
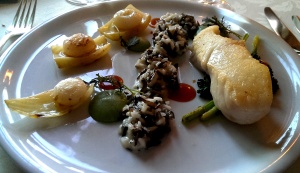
Pan-fried Halibut

Pan-fried Halibut

George had pan-fried halibut, Alfred le Fermier cheese risotto (which included wild rice), citrus braised fennel, and aniseed spinach mousse.

“Pre-dessert” of tiny ice cream cones

“Pre-dessert” of tiny ice cream cones

Nyangbo dark chocolat tartelette

Nyangbo dark chocolat tartelette

We had a “pre-dessert” of tiny ice cream cones filled with a cheesecake-like mixture. For dessert, I had Nyangbo dark chocolat tartelette, hazelnut ice cream, rowan ivory soft ganache, and several presentations of mango.

Creamy cake with maple syrup meringue

Creamy cake with maple syrup meringue

George’s dessert choice was creamy cake with maple syrup meringue, honey crisp apples, and blackberry coulis. I’ve never seen cake topped with meringue, but it worked really well, and the maple flavor was just perfect. Truly a memorable dessert!
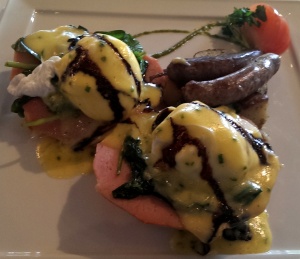
Eggs Benedict

Eggs Benedict

I cannot say enough about the service at Hovey Manor. The dining room is not terribly large – perhaps 50 seats, but there were at least twelve servers attentive to our every need. I can’t remember such service in my life.

Breakfast the next morning was spectacular, but I was still recovering from the previous night’s dinner.

George pronounced his eggs Benedict the best he’d ever had.

Day 2 focused less on eating, and after attending the mid-day mass at the Abbey of Saint-Benoît-du-Lac (where the monks sang the entire liturgy in Gregorian chant style), we set out to visit various settings of Louise Penny mysteries in the Eastern Townships. In Knowlton, we went to Brome Lake Books, the bookstore where she holds her book launches (she lives somewhere unspecified in the Knowlton/Sutton area). The staff there were delightful, and gave us a newly printed map that fans can follow to view the places that inspired different settings in her books. Looking at the map, we realized that we had lunched at the equivalent of Gabri and Olivier’s Bistro. Since one mystery had been set in a monastery – loosely modeled after St. Benoit du Lac – we were able to tick that one off. Another mystery was set at a disguised Hovey Manor – another check. The bookstore added one more check, and so we traveled to Stanbridge E. to see the mill where the famous shootout took place. Clearly, Louise has a wonderful imagination, and none of the places were as I’d imagined them. The CBC movie Still Life was filmed in Stanbridge E., but given that it is truly not much more than the crossing to two roads, it will be interesting to see how they get the charming village of Three Pines out of it.

When we arrived back at Hovey Manor, they said they’d saved us a table. We were slightly dismayed because even though I’d had a light lunch (that term isn’t in George’s vocabulary); I still wasn’t ready for another gargantuan meal.  We bit the bullet and had another excellent dinner.

The next day, we visited nearby North Hatley – another village upon which Three Pines was based. From our previous visits, we know it is quite small, and I was hoping I’d feel as though I’ve found Three Pines.  It was smaller, and quite lovely, but Three Pines it was not.  From there we pressed on to Quebec City and the Chateau Frontenac where we spent half of our honeymoon in 1972. We agreed we would have a simple dinner.

Posted by: njbrown | May 2, 2013

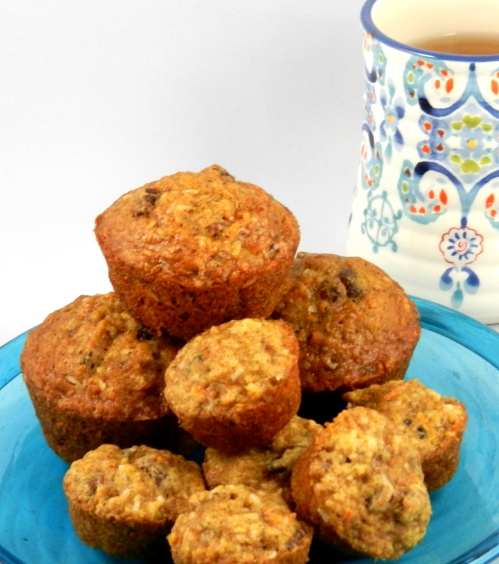
Walnut House “Marvellous Muffins”


Walnut House Marvellous Muffins

Walnut House Marvellous Muffins

Recently, George and I had tea with Gill Sprawson at her charming
Walnut House B & B
here in town.  With our tea, she served delicious mini muffins (often served for breakfast to her guests), and I ate one, then two, and finally was able to stop after three.  The good news was that even three mini muffins feel more virtuous than one regular muffin.  These “Marvellous Muffins” came out of Gill’s recipe file, and it was clear that the recipe was many years old.  Gill kindly agreed to let me copy it.  The texture and flavor are similar to carrot cake, but I think the apple, coconut and raisins are a nice addition.  In the pre-food processor days, all the grating might have been a deterrent to making these, but using the processor, the apple and carrots can be grated in about a minute.

Whether you make them in the mini size or large, I think you’ll enjoy them.

Recipe:
(Makes approximately 48 mini muffins, or about 20 regular size muffins)

Ingredients:

  • 2 cups all purpose flour
  • 1 ¼ cup granulated sugar
  • 2 teaspoons baking soda
  • 2 teaspoons cinnamon
  • ½ teaspoon salt
  • 2 cups finely grated carrots
  • ½ cup raisins
  • ½ cup pecans or walnuts (chopped)
  • ½ cup sweetened coconut
  • 1 apple, peeled, cored and grated
  • 3 eggs
  • 1 cup oil
  • 2 teaspoons vanilla

Instructions:

  1. Preheat oven to 350 degrees.
  2. Mix flour, sugar, baking soda, cinnamon and salt in a very large bowl.
  3. Stir in grated carrots, raisins, nuts, coconut and grated apple.
  4. In separate bowl, with paddle attachment, beat eggs, oil and vanilla together.
  5. Beat half of dry ingredients into wet, then add remainder of dry ingredients and beat just until combined.
  6. Spoon batter into greased muffin tins, filling ¾ of the way full.
  7. Bake mini muffins 10 to 15 minutes or until a toothpick inserted into the center comes out clean.  Bake full size muffins 25 to 30 minutes.
Posted by: njbrown | April 21, 2013

Return to Roulades


Our kitchen is 99% finished, and we are all enjoying much improved lighting, off-white quartz counter tops and stainless appliances (including a new stove with a double oven).  Losing my second oven when we moved to this house was really painful, so the world is right again.  However, all the tasks that were put on hold during the upheaval still have to be done, and my husband is too busy to take photographs for me for a while.  So, rather than making something, I decided to share the excellent video on roulades I received from Fine Cooking this week.

Fine Cooking’s senior food editor Shelley Wiseman demonstrates Karen Barker’s technique for rolling a roulade without letting the cake crack.

I’ve tried to write the process of removing the roulade from the baking pan, rolling it, unrolling it and re-rolling it in my  posts,

But this site enables you to see each step.  They also give three roulade recipes.  If you haven’t done a roulade before, this might motivate you to try.  Have fun!

Posted by: njbrown | March 19, 2013

Posting Suspended For Kitchen Renovations


After eight years of living with brown Formica counters and black appliances in our “retirement home,” we are making the kitchen lighter and brighter – pale cream quartz counters, lots of recessed and under cabinet lighting, stainless appliances, and a backsplash that combines horizontal glass, stone and blue/green onyx tiles.    We’ve chosen a white composite 30-inch undivided sink, so for the first time in my life, I’ll be able to lay roasting pans, large cookie sheets etc. in the sink to wash them.  In the next three weeks, we will have a parade of workers coming through, and I dread the mess and disruption, but it will be much better afterwards.  George says I better do a lot of cooking in the improved kitchen!

Best wishes,

Nancy

Posted by: njbrown | March 17, 2013

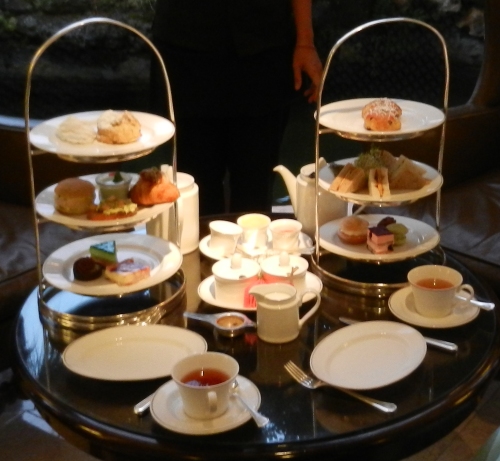
Afternoon Tea At the Princess in Hamilton, Bermuda


Afternoon Tea At the Princess in Hamilton, Bermuda

Afternoon Tea At the Princess in Hamilton, Bermuda

As many Canadians (or Americans living in Canada), we were driven by months of cold and snow to seek sun and relative warmth – specifically, in Bermuda – at the end of February.  My husband had been there while serving in the U. S. Navy in the 1970, but I had never visited.  My sister had been urging me for years to go, saying she was sure I would love it.  She recommended the Hamilton Princess (one of the Fairmont family of hotels), for its history, elegance, and easy walking distance to downtown Hamilton.

The Fairmont Hamilton Princess, Bermuda Resort Hotel

Gold Lounge The Fairmont Hamilton Princess, Bermuda

I’ve learned never to argue with my sister.  She was absolutely right about everything.  We loved the Princess, and especially the Gold Lounge – one of the most beautiful rooms I’ve seen in North America – where we were waited on with the utmost graciousness. In Bermuda, in addition to pink(ish) sand, turquoise water and places of historical interest, we found a wonderful commitment to doing things properly that was quite soothing.  We look forward to returning. Searching for the ultimate afternoon tea is one of my minor hobbies, and the Princess’ is supposed to be one of the ten best in the world, so we had to try it.  They offered two tea menus, so George had one (the Seasonal Tea), and I had the other (the November Tea).  With his tea, George drank the Fairmont Earl Grey.  I had a delicious cherry-flavored tea.  When we left, we asked for a copy of the menu.  On it, we found the Specialty Rum Tea, which apparently wasn’t available.  If it had been, I certainly would have ordered it.

Here are the menus (the November tea was still being offered):

Seasonal Tea

Princess Beef Wellington
Horseradish and Herb Cream
Mustard Painted Rolled Lavosh

Truffle Hens Egg
Scallion Confetti
Focaccia Gateaux

Atlantic Shrimp and Cress
Vodka Cocktail Salsa
Split Petit Croissant

Balsamic Splashed Roma Tomato and Mozzarella
Crisp Basil Bruschetta
Toasted Pangolin

Minted Cucumber and Yogurt Shooter
Fresh Cracked Pepper
Cucumber Swizzle Stick

Raisins, Cherries & Ginger Nutty Streusel Scone
Tomato, Lemon and Apple Jam

Scented Fruit Meringue

Raspberry Cheesecake Square
Lemon Curd and Chocolate Cup
Strawberry and Kiwi Slice

Peach Sorbet

$34 plus 17% gratuity

November Steeped Tea Special

Featuring “Eclipse” The British Empire Classic Tea

Scottish Smoked Salmon
Citrus and Horseradish Scented Aioli
Whole Wheat Sandwich Bread

Princess Garden
Herb Cream Cheese, English Cucumber
Sea Salt Butter
White Sandwich Bread

Hens Egg Salad and Cress
Light English Mustard Spread
Whole Wheat Sandwich Bread

English Cheddar and Branston Pickle
Fresh Cracked Pepper and Chives
White Sandwich Bread

Coronation Chicken
Mango Butter and Almonds
Whole Wheat Sandwich Bread

Pumpkin and Chocolate Chip Scone
Victoria Sponge Cupcake
Fresh Lemon Curd

Kirsch Mousse, Brandied Cherries
Pistachio Almond Macaroon
Chocolate Fudge Pyramid
Sweet Mango Sorbet

$34 plus 17% gratuity

Specialty Rum Tea

Smoked Salmon and rum Spiked Cream Cheese
Piped into Pumpernickel Gombey Jam Spread

Oriental Duck and Vegetable Wrap
“Dark and Stormy” Aioli

Rotisserie Chicken and Caramelized Local Onion
Crumbled Blue Cheese
Goslings Butter, Shallot Bun

Hamilton Po’Boy
Tender Lobster and Baby Shrimp
Rum Splashed Marie Rose
Whole Wheat Slider

Dark Rum, Bloody Mary Shooter
Tabasco and Worchester Splash
Celery Swizzle

Oat, Cranberry and Black Rum Scone
Key Lime Jam

Bacardi Rum Coconut Macaroon

Mango and Lime Rum Mousse Cup
Bermuda Dark Rum Cake
Bacardi Razz Almond Rum Ball

Banana Rum Swizzle Sorbet

$34 plus 17% gratuity

Posted by: njbrown | March 4, 2013

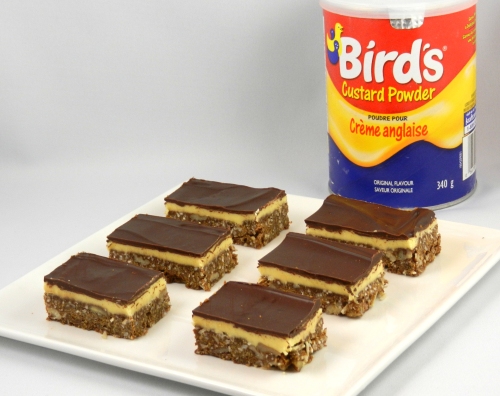
Nanaimo Bars


Nanaimo Bars

Nanaimo Bars

Nanaimo Bars are among the truly Canadian inventions (although apparently something very similar was made in New York).  The history varies from source to source, but the recipe dates back to the 1950s and a community cookbook compiled in the city of Nanaimo on Vancouver Island in British Columbia.  The bars have a crumb/nut/coconut base, a butter cream/custard layer, and a top layer of chocolate.  Most recipes do not involve baking, but the one below does.  Also, this recipe uses chocolate rather than the traditional cocoa.  In the past, I’ve found Nanaimo Bars almost too sweet to eat, so I searched for a recipe that was less sugary.  If you use Bird’s Custard Powder (available in groceries in U.K. and Canada; from Amazon if you can’t find it in U. S. groceries), the filling is not off the sweetness chart.  Vanilla instant pudding mix can be used instead, but it makes the bars extremely sweet – too sweet for many.  One small Nanaimo Bar satisfies most people.

This recipe is easily “veganized,” using Earth Balance instead of butter, almond (or soy)milk, and egg replacer for the one egg.

Ingredients:

  • 6 oz. Callebaut 70% bitter sweet morsels, divided
  • ¾ cup plus 1 Tbsp. Butter (or Earth Balance), softened, divided
  • 1 egg
  • 1 ½ tsp. vanilla, divided
  • 2 cups graham crumbs
  • 1 cup flaked unsweetened coconut
  • ½ cup chopped pecans or walnuts
  • 2 Tbsp. Bird’s Custard Powder
  • 3 Tbsp. milk (or almond milk)
  • 2 cups icing sugar

Directions:

  1. Heat oven to 350°F.
  2. Microwave 2 oz. chocolate and ½ cup butter in large microwaveable bowl on medium 2 min. or until butter is melted.
  3. Stir until chocolate is completely melted.
  4. Blend in egg and 1 tsp. vanilla.
  5. Stir in graham crumbs, coconut and nuts.
  6. Press onto bottom of 9-inch square pan.
  7. Bake 8 min.; cool completely.
  8. Mix custard powder and milk in medium bowl with whisk until blended.
  9. Add ¼ cup of the remaining butter and ½ tsp. vanilla; mix well.
  10. Gradually beat in sugar until blended.
  11. Spread onto crust.
  12. Refrigerate 15 min.
  13. Microwave remaining chocolate and butter in microwaveable bowl 2 to 3 min. or until butter is melted.
  14. Stir until chocolate is completely melted.
  15. Spread over custard layer.
  16. Refrigerate several hours or until chilled before cutting into bars.

Note: For easy removal from the pan and cutting, line pan with aluminum foil with a generous overlap at both sides to make handles.

Adapted from: Kraft Foods Nanaimo Bars

Posted by: njbrown | February 11, 2013

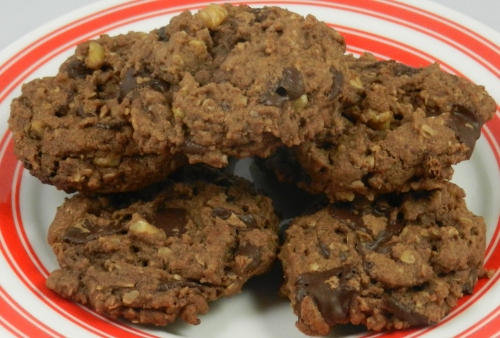
“Addictive” Chocolate Chocolate Chip Cookies


“Addictive” Chocolate Chocolate Chip Cookies

My son pronounced these cookies, “addictive.”  In fact, this post was delayed because he ate the whole first batch, not realizing I’d need some for a picture.  They are chocolaty, chewy on the inside but crisp on the outside, and even healthy with their oatmeal ingredient. These cookies come together quickly and easily, but disappear fast.  If you use Bernard Callebaut morsels, they will not stay firm as do ordinary chocolate chips, so you have little islands of soft chocolate throughout each cookie.  My thanks to food.com for the recipe (Country Cowboy Cookies).

Note:  the recipe said to measure out the dough in teaspoonfuls, and that the recipe would make 30 to 36 cookies.  When I used my understanding of that measure, I had 4 dozen small cookies, so I added “generous” to the instruction for teaspoon quantities.  Using a small cookie scoop (approximately one tablespoon) makes 30.

Makes 30 cookies

Ingredients:

  • ¾ cup flour
  • ¼ cup unsweetened cocoa powder
  • ½ teaspoon baking soda
  • ¼ teaspoon salt
  • ¼ teaspoon baking powder
  • ½ cup butter or Earth Balance
  • ½ cup white (granulated) sugar
  • ½ cup (packed) brown sugar
  • 1 egg
  • 1 cup quick-cooking oats
  • 1 cup chocolate chips (I prefer Bernard Callebaut 70% bittersweet morsels)
  • ½ cup nuts

Directions:

  1. Preheat oven to 350°F
  2. Sift together dry ingredients; set aside.
  3. Blend together margarine (or shortening) and sugars.
  4. Add egg & beat until light & fluffy then stir in vanilla.
  5. Combine with dry ingredients & mix well.
  6. Add remaining ingredients & mix well.
  7. Drop by teaspoon onto greased or parchment-lined cookie sheets and bake in preheated 350°F oven for 12 minutes.

Allow a few minutes longer if you prefer crisp cookies.

Posted by: njbrown | January 23, 2013

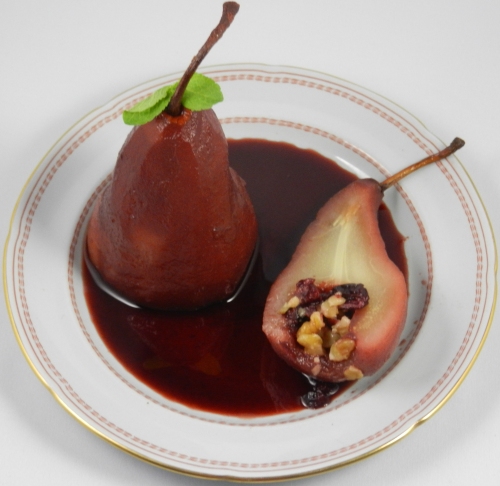
Fruit and Nut-stuffed Poached Pears


DSCN2293a

Fruit and Nut-stuffed Poached Pears

More than three years ago, I attempted to recreate one of the first recipes I’d learned in cooking school, but the original recipes was long gone.  I had trouble knowing when to stuff the pears, and eventually blogged Best (yet) recipe for red wine-poached pears with no stuffing.

In the years since, I researched enough to feel confident trying it again, and this time, there were no problems.  This is a delighful dessert, with an intense red-wine flavor.  My previous recipe had the pears served on whipped, sweetened mascarpone, and the mascarpone off-set the intensity of the wine mixture.  The stuffing adds more flavors and textures, and the ultimate recipe might be for stuffed pears served on the mascarpone mixture.  While I have used walnuts and cranberries in the stuffing, other recipes call for ganache or even chocolate bits inserted into the cavity.  Various kinds of nuts could be used, and raisins or dried cherries or apricots.  You can be as creative as you like!

Fruit and Nut-stuffed Poached Pears

(Serves 4 to 6)

For poaching:
Ingredients:

  • 1 bottle Merlot
  • 4 to 6 Bosc pears – pears need to be firm, but not too firm
  • ½ c. sugar
  • 1 cinnamon stick
  • 2 cloves
  • ¾˝ peeled piece of ginger – sliced
  • One orange – zested and juiced
  • Juice of one lemon

Directions:

  1. Put Merlot in saucepan just large enough to hold pears.
  2. Zest orange and add zest and orange juice to Merlot along with sugar, lemon juice, cinnamon, cloves and ginger.
  3. Cut slices off bottom of pears (if necessary) so they will stand straight on the plate.
  4. Core pears using apple corer and/or melon-baller (parisienne scoop).
  5. Peel pears – leaving stems intact – and add each one as peeled to poaching liquid to prevent discoloration.
  6. Once all pears are in liquid, bring to just below simmer stirring gently to help melt the sugar.
  7. Cover pears with circle of parchment paper ½˝ larger than pan, and weight with small plate to keep pears submerged.
  8. Poach for approximately 20 minutes – time will vary with size and ripeness of pears.
  9. When done, it should be possible to pierce the bottom easily with a sharp knife. Once done, let pears cool ten minutes in liquid.
  10. Remove pears to a glass or ceramic bowl.
  11. Strain poaching liquid and cover pears with the liquid.
  12. Refrigerate covered with plastic wrap at least overnight, and up to 3 days.  Periodically, rotate pears so they color evenly.
  13. Before serving, return poaching liquid to pan and boil to reduce until it is syrupy – approximately 30 minutes. After reduction, you should have about 1 c. of syrup.

Stuffing mixture:
Ingredients:

  • ½ cup chopped walnuts
  • ½ cup chopped dried cranberries
  • 2 Tb. maple syrup

Instructions:

  1. Mix chopped walnuts, cranberries and maple syrup together.
  2. Pack gently, but firmly into each pear cavity.
  3. Put on plate and cover with Saran and refrigerate until about two hours before serving.

Mascarpone:
Ingredients:

  • 1 ½ c. mascarpone
  • 3 Tb. sugar
  • ¼ teaspoon vanilla

Directions:

  1. Beat ingredients together until fluffy.
  2. If you like a more intense vanilla taste, increase the amount of vanilla.

Serving:

I think these are best served at room temperature, so the pears have to be removed from the refrigerator approximately 2 hours before eating.

If serving without mascarpone, place a pear on the plate, pour a bit of syrup over each pear, and garnish with a sprig of mint.

If you want to use the mascarpone, put a dollop on the plate, place the whole pear on top, spoon wine syrup over top and garnish with mint.

Posted by: njbrown | January 15, 2013

Cranberry Orange Walnut Shortbread Cookies


Cranberry Orange Walnut Shortbread Cookies

Cranberry Orange Walnut Shortbread Cookies

A combination of blogger’s block and a hectic December and early January have kept me from posting. The nicest part of the holidays was a visit from Becoming Madame who was in town from Paris to celebrate the holidays with her family. We connected a year ago over my Bûche de Noel post, and have had a lively correspondence since, in spite of a thirty-five year difference in our ages. I will treasure the memory of this visit, and hope for another when she returns. If you haven’t been to her blog, do check it out. What she tells of herself is just the tip of a very impressive iceberg. She is truly an amazing woman!

I had planned to do a healthy recipe to start the new year, but the one I tested wasn’t worth passing on, and I returned to something more fun. These cookies were motivated by the James Madison cookie contest currently in process by the bloggers of Belle Grove Plantation Bed and Breakfast  . Entries don’t have to be appropriate to the early 1800s, so I didn’t have to worry about the unavailability of oranges at that time. These cookies are a variation of a recipe from the Ocean Spray site. I think they are quite nice, and the ones made in balls seem to be more even more flavorful than the flat version. They are quick and easy to make, and I hope you’ll enjoy them.

Cranberry Shortbread Cookies

Makes approximately 4 dozen

Ingredients:

  • 1 ¼ cups butter, softened
  • 1 cup powdered sugar
  • 2 ¼ cups all purpose flour
  • 5-ounces (1 cup) dried cranberries, chopped
  • ½ cup chopped walnuts
  • 1 generous tablespoon grated orange zest

Directions:

  1. Preheat oven to 325°F.
  2. Cream butter and sugar until light and fluffy.
  3. Mix in the flour, a little at a time, until combined.
  4. Stir in dried cranberries, zest and walnuts.
  5. Cookies can be made into balls or flattened. To make round cookies, roll dough into 1-inch balls. Place 1 dozen at a time on ungreased cookie sheets.
  6. Bake 15 to 17 minutes. Cool
  7. To make flat cookies, form dough into 1-inch balls as directed above. Using the wet bottom of a glass dipped in granulated sugar; flatten balls on cookie sheet, making rounds 2-inches in diameter.
  8. Bake 12 to 14 minutes. Cool.
Posted by: njbrown | November 30, 2012

Peppermint Cheesecake


Peppermint Cheesecake

Peppermint Cheesecake

Today we had snow, and with less than a month to go until Christmas, I’ve been thinking of new Christmas recipes.  I’ve always associated peppermint with Christmas – probably because of traditional candy canes.  Now, however, as so many other things, candy canes have changed, and peppermint ones are red, white and green here in Canada, and the red and white ones are cherry-flavored.  That seems very wrong to me!  This cheesecake was made with peppermint candies that I finally found at Bulk Barn (red and white peppermints being very hard to find for some reason).  In a perfect world, I would have crushed traditional candy canes, but one has to adapt.

This recipe came from Taste of Home.  It is not a low-calorie cheesecake, containing 40 oz. of cream cheese and a cup of sour cream, but it is a special Christmas treat.  I think it is the smoothest, creamiest cheesecake I’ve ever had.  Rather than following the directions from Taste of Home, I used my low and slow baking technique that produces a perfect cheesecake every time.

Yield: 16 servings.

Ingredients:

  Crust:

  • 1-½ cups graham cracker crumbs
  • ⅓ cup butter, melted
  • ¼  cup sugar

  Filling:

  • 5 packages (8 ounces each) cream cheese, softened
  • 1 cup sugar
  • 1 cup sour cream
  • 2 tablespoons all-purpose flour
  • 1 teaspoon vanilla extract
  • 5 eggs, lightly beaten
  • 30 peppermint candies, crushed (I find a small meat mallet works really well) – about 3/4 cup
  • Red food coloring, optional

  Topping:

  • 1 cup heavy whipping cream
  • ¼ cup confectioners’ sugar
  • Additional crushed peppermint candies

Directions:

  1. Preheat oven to 350°
  2. In a small bowl, combine the cracker crumbs, butter, and sugar. Press onto the bottom of lightly buttered 10″ springform  pan.
  3. Place pan on a baking sheet. Bake at 350° for 8-10 minutes or until set. Cool on a wire rack.
  4. In a large bowl, using K beater on low-speed beat cream cheese and sugar until smooth.
  5. Beat in the sour cream, flour, and vanilla.
  6. Add eggs; beat on low-speed just until combined.
  7. Fold in crushed candies and a few drops of red food coloring if desired.
  8. Pour over crust.
  9. Put in 350° oven and immediately reduce heat to 250°  – bake for 90 minutes.
  10. Turn oven off and leave cheesecake in oven 90 more minutes. Do NOT open oven during the 3 hours of baking.
  11. Remove from oven
  12. Carefully run a knife around edge of pan to loosen; cool on rack until bottom is cool.
  13. Refrigerate overnight. Remove sides of pan.
  14. Just before serving, in a small bowl, beat cream until it begins to thicken. Add confectioners’ sugar; beat until stiff peaks form.  Pipe decorative edge with a star tip.  Sprinkle with additional crushed candies as you like.
Posted by: njbrown | November 19, 2012

Stuffed Sweet Dumpling Squash


Stuffed Sweet Dumpling Squash

While Canadian Thanksgiving is past, American Thanksgiving is less than a week away. Making a different vegetable dish is always a challenge for me, and finding one that can be made ahead is a real plus. In Julia’s The Way to Cook, I found a recipe for stuffed pattypan squash that looked appealing, even though I’ve never made squash (other than spaghetti squash) in my life. Julia said pattypans are available all year round, but I couldn’t find them in our wonderful produce store. However, they had sweet dumplings that looked cute, although they are larger than pattypans. The recipe below differs from Julia’s only in the method of cooking the squash (and the lemon juice and bread crumbs that I added). I think the flavors and textures are quite nice, and the stripes are fun. I hope you enjoy them if you add them to your Thanksgiving or Christmas menu.(Serves 4 to 6)

Ingredients:

  • 3 Sweet Dumpling Squash

  The stuffing:

  • 1 ½ cups minced onion
  • ½ cup dry white French vermouth or dry white wine
  • 1 to 2 Tbs butter
  • 1 “large” egg – preferably free range
  • ½ cup cream cheese, or ⅓ cup sour cream
  • ½ cup lightly pressed down crumbs from fresh homemade type white bread
  • Pinch of thyme
  • Lemon juice to taste
  • Salt and freshly ground pepper
  • ¼ cup grated Swiss cheese
  • 1 cup, more or less, chicken broth
  • Panko bread crumbs – approximately ½ cup

Directions:

  1. Cut squash in half and remove seeds. Place cut side down in roasting pan at 350 degrees for 35 to 40 minutes.
  2. Using a melon baller, remove flesh from each half, leaving about ¼ inch all around.

  The stuffing:

  1. Mash up removed flesh. To remove excess juice, twist the flesh hard in the corner of a towel held over a bowl.
  2. Simmer minced onions in vermouth 7 to 8 minutes, until tender. Add the butter and the flesh, and boil slowly to evaporate liquid almost completely. Let cool briefly; blend in the egg, cheese, and bread crumbs. Season to taste with salt, pepper, and thyme.
  3. Stuffing the squash:
  4. Divide the stuffing into 4 to 6 portions, and mound into the squash halves; top each with a pinch of grated cheese. Arrange them in one layer in a baking dish, and pour around them ¼ inch of chicken broth.
  5. (May be made ahead to this point and refrigerated.)
  6. Baking – about 15 to 20 minutes at 400 degrees.
  7. Bake in the upper 1/3 of the preheated oven,
  8. After putting in oven, sauté the Panko bread crumbs with a little butter until lightly browned, and set aside.
  9. While baking, baste several times with the liquid in the pan. In last 10 minutes, sprinkle lightly with bread crumbs and continue baking until the squash are well heated through and the cheese and crumbs have browned lightly. They may be kept warm for 15 to 20 minutes before serving.
Posted by: njbrown | November 9, 2012

Pumpkin Spice Cookies


Pumpkin Spice Cookies

Most of the leaves have fallen, and the temperature at night is near freezing.  On a blustery fall day, a cup of tea with cookies is comforting and restorative.I found this recipe on the Web, and added chopped pecans for some crunch.  The cookies have all the nice flavors of pumpkin pie, but are more portable.  If you, like me, don’t know what to do with the unused portion of a can of pumpkin puree after making a pie, this is your answer.

The recipe said that it makes 60 cookies, but I found it made 36 (about 3 inches across).

Special thanks to: Ali

(The mug is from the beautiful Chesterfield Inn in Chesterfield, N. H.  )

Ingredients

  • 2 ½ cups all-purpose flour
  • 1 teaspoon baking powder
  • 1 teaspoon baking soda
  • 2 teaspoons ground cinnamon
  • ½ teaspoon ground nutmeg
  • ½ teaspoon ground cloves
  • ½ teaspoon salt
  • ½ cup butter, softened
  • 1 ½ cups white sugar
  • 1 cup canned pumpkin puree
  • 1 egg
  • 1 teaspoon vanilla extract

Frosting:

  • 2 cups confectioners’ sugar
  • 3 tablespoons milk
  • 1 tablespoon melted butter
  • 1 teaspoon vanilla extract

Garnish

  • Approximately 1/2 cup chopped pecans

Directions:

  1. Preheat oven to 350 degrees F (175 degrees C).
  2. Combine flour, baking powder, baking soda, cinnamon, nutmeg, ground cloves, and salt; set aside.
  3. In a medium bowl, cream together the ½ cup of butter and white sugar.
  4. Add pumpkin, egg, and 1 teaspoon vanilla to butter mixture, and beat until creamy.
  5. Mix in dry ingredients.
  6. Drop on cookie sheet by tablespoonfuls; flatten slightly.
  7. Bake for 15 to 20 minutes in the preheated oven.
  8. Cool cookies, then spoon about 1/2 teaspoon of glaze on each cookie and top with a sprinkle of chopped pecans.

To Make Glaze:

  1. Combine confectioners’ sugar, milk, 1 tablespoon melted butter, and 1 teaspoon vanilla.
  2. Add milk as needed, to achieve desired consistency.
Posted by: njbrown | October 31, 2012

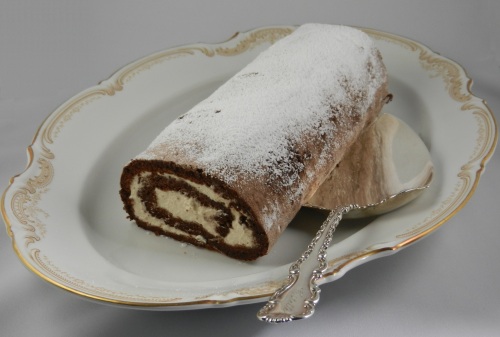
Flourless Chocolate Roulade – (Foolproof Bûche de Noel)


Flourless Chocolate Roulade – (Foolproof Bûche de Noel)

This year, I’ve watched Jacques Pepin demonstrate chocolate roulade on Essential Pepin on PBS, and Anna Olson make her version of chocolate roulade on Food Network’s Bake. Both times, cracking of the roulade either occurred or we were warned about the likelihood. In my search over the years for a Bûche de Noel that wouldn’t crack, I came across a recipe in a newspaper that makes a roulade that has never, ever cracked for me. The recipe couldn’t be easier – just five ingredients and it comes together in less than an hour (compared with three to four hours for Julia Child’s traditional recipe (see Julia’s Bûche de Noël Recipe with Improved Directions). This recipe is attributed to Mrs. Connie Douglas, “fashion copywriter and mother of three.” I don’t know where I was living at the time to be able to name the paper, and the little recipe may have even come from a women’s magazine. All I can tell you is that it really works. The finished roulade is light as a cloud, with a very gentle flavor.

The roulade with coffee-flavored whipped cream filling can be served at any time of year. Anna Olson filled her roulade with a chocolate whipped cream, added cherries to the filling, and then iced the whole thing with vanilla whipped cream to make a Black Forest Roulade. In the years when my children were small and time was very limited, I used canned icing to fill and frost it to make a Bûche, and almond paste to make the “mushrooms.” You are only limited by your imagination.

Below is the original recipe, and then a recipe for chocolate whipped cream filling and frosting if you choose that option. Using white modeling chocolate instead of meringue to make mushrooms for the Bûche would also be a time-saver.

Chocolate Roulade

(Serves about 8)

Ingredients:

  • 5 Egg yolks
  • 5 Egg whites
  • 1 cup icing sugar
  • 3 T. unsweetened cocoa
  • Approximately ½ cup powdered sugar for covering cake and garnishing

Directions:

  1. Preheat oven to 350 degrees.
  2. Whip egg whites until stiff.
  3. Sift icing sugar with cocoa, and then add gradually to the egg whites beating constantly.
  4. Beat egg yolks until lemon colored, then fold into whites.
  5. Spread batter on buttered wax paper-lined 10”x17” cookie sheet. Smooth batter, and work into all corners.
  6. Bake 20 minutes.
  7. Using fine sieve, sift powdered sugar in a thin layer over all of the cake.
  8. Cover with a tea towel, and then cover with another cookie sheet.
  9. Invert.
  10. Remove hot cookie sheet, and gently and carefully remove the wax paper. Run spatula under the sides of the cake.
  11. Sift a thin layer of powdered sugar over the entire cake, and gently roll up in the towel and let cool, seam side down.
  12. Make coffee-flavored filling (or chocolate filling and frosting):
  13. Gently unroll cake and spread filling over cake. Reroll. Cut a small slice off each end with a very sharp knife to reveal filling.
  14. Using an offset spatula slipped under one end of the roulade, transfer it to a serving platter.
  15. If making a Bûche, ice the outside of the roulade as well as the inside, and run a fork (tines down) from one end to the other to create a bark effect (see Julia’s Bûche de Noël).
  16. Sift powdered sugar over the finished roulade. (I put strips of waxed paper or Saran wrap under the sides of the roulade to catch powdered sugar that would otherwise fall on the serving plate.)
  17. Remove strips, and refrigerate until serving (up to about 8 hours).
  18. Just before serving, decorate with artificial mushrooms, if desired, having sifted a little cocoa powder over them.

Coffee-flavored filling:

Ingredients:

  • 1 cup heavy cream
  • Powdered sugar to taste
  • 1 rounded teaspoon instant coffee

Directions:

In a chilled bowl and with chilled beaters, whip heavy cream sweetened to taste with powdered sugar and instant coffee until stiff.

Chocolate Whipped Cream for filling and Icing:

  • 1 ½ cup heavy whipping cream
  • ¼ teaspoon pure vanilla extract
  • Confectioners’ (powdered) sugar to taste
  • 3 tablespoons unsweetened cocoa powder

Directions:

In a chilled bowl and with chilled beaters, combine all ingredients and whip until stiff.

Posted by: njbrown | October 24, 2012

Delicious Vegan Gluten-free Pumpkin Pie


Delicious Vegan Gluten-free Pumpkin Pie

When my daughter became a vegan, I thought I’d met the ultimate cooking challenge, but when she found she was gluten-intolerant, it seemed like a culinary Mission Impossible.  Because I love to make things that my family enjoys, especially at holidays, her not being able to have treats like pumpkin pie for Canadian Thanksgiving was painful for me.  My daughter is certainly not alone in her gluten problem.  There apparently has been a dramatic increase in gluten intolerance (See The Rise Of Gluten Intolerance), and even mainstream restaurants are beginning to offer gluten-free items.  Genetically modified wheat is one explanation that has been floated, but I have no idea whether it is accurate.  The bottom line is that sooner probably rather than later, we will all have gluten-intolerant dinner guests.

I’d tried using gluten-free flour in the past with Earth Balance to make pastry, but it clearly wasn’t as good.  For this pumpkin pie, I decided to see if the oatmeal crumble mixture I use for fruit crisps (see post: Easy Apple Crisp) might hold together, have a nice flavor and interesting texture with gluten-free all-purpose flour substituted for regular all-purpose, and Earth Balance substituted for butter.  To my great satisfaction, the mixture came together well and made a nice and different kind of crust (somewhat like a graham cracker crust, but with more texture).  Using cornstarch to thicken the spiced pumpkin mixture was successful, and I don’t think anyone would have detected the lack of eggs in it.  We all agreed that the flavor is delicious and even better the day after the pie is made.

This easy recipe means you’ll never have to be dismayed if you find a gluten-intolerant vegan is coming for dinner.

Oatmeal Crumble Crust Ingredients:

  • ¾ cup brown sugar
  • ½ cup gluten-free all purpose flour
  • ½ cup oats (not quick-cooking)
  • ⅓ cup Earth Balance (melted)

Directions:

  1. Mix all ingredients in bowl, and press into pie pan.
  2. Chill at least 20 minutes.

Filling Ingredients:

  • 1 can (15 oz.) of pumpkin
  • ¾ cup sugar (or less, depending on taste)
  • 1 teaspoon cinnamon
  • ½ teaspoon ginger
  • ½ teaspoon allspice
  • 1 ½ cups vanilla soy or almond milk
  • 4 tablespoons cornstarch or arrowroot
  • 4 tablespoons water

Directions:

  1. Mix the pumpkin, sugar, cinnamon, ginger, and allspice together in a large bowl.
  2. Heat the milk in a small saucepan over low heat.
  3. Dissolve the cornstarch or arrowroot powder in a small amount of cold water.
  4. Add the dissolved cornstarch to the heated milk. Bring to a boil for one minute, and then remove from heat. The milk mixture should resemble vanilla pudding.
  5. Stir the thickened milk into the pumpkin mixture.
  6. Fill chilled crust and bake at 425 degrees for 15 minutes; reduce heat to 350 degrees, and continue baking another 40 to 50 minutes, until filling is set. If crust begins to get too brown, cover crust with foil and continue baking.
  7. Let the pie cool for about two hours before serving or even overnight.

Thanks to Christy Jones for the filling recipe:  http://suite101.com/article/vegan-pumpkin-pie-recipe-a171944

Posted by: njbrown | October 3, 2012

Snow Pea and Radish Salad


Snow Pea and Radish Salad

A recent recipe from Bon Appétit on-line for a snow pea and radish salad inspired this recipe.  They recommended serving it with crispy rainbow trout, but since my daughter has been urging me to do a vegan recipe, I focused on the salad and modified the yogurt-based dressing recommended by Bon Appétit to be vegan-friendly.  Outside of Chinese restaurants, I haven’t had snow peas for many years, and I don’t know if I ever had them uncooked.  I found them to be delicious raw, and the peppery accent of the radishes is a nice touch.  Vegan or non-vegan, whether served alone or with trout or some other protein, I think you’ll enjoy this.

(Serves 2)

Ingredients:

  Dressing:

  • 2 T extra virgin olive oil
  • 1 T balsamic vinegar
  • 2 T fresh orange juice
  • ¼ teaspoon grated orange zest
  • A pinch of cinnamon

  Salad:

  • 6 oz. fresh snow peas julienned
  • 4 radishes thinly sliced
  • 1 T. chopped chives
  • 1 teaspoon sesame seeds

Directions:

  1. Combine julienned snow peas with radishes in serving bowl.
  2. Combine dressing ingredients.
  3. Toss peas and radishes with dressing and plate.
  4. Sprinkle with chives and sesame seeds.
Posted by: njbrown | September 26, 2012

Ursula’s Rum Cake


Ursula’s Rum Cake

This is the second recipe that appealed to me from The Body in the Gazebo.  Ursula is the elderly mother of sleuth Faith Fairchild’s best friend.  A murder on Martha’s Vineyard when she was very young is the focus of the plot.

In the 60s, cakes made in Bundt pans were all the rage.  They involved using cake mix and a box of instant pudding.  The fad for Bundt cakes went out, and I eventually gave my pan away.  In order to make this, I had to buy another, but I’m so glad I did.  This is an absolutely wonderful cake!  There is a pronounced orange flavor, and it is very nutty.  The texture is light and moist.  After a small test piece, I could have eaten the whole thing, but I restrained myself.  It was hard to detect the rum, and I think the addition of ¼ teaspoon of rum extract would enhance the rum flavor.
Katherine Hall Page, author of the Faith Fairchild mysteries, writes, “Truth be told, this extraordinary recipe is not Ursula Lyman Rose’s, but Valerie Wolzien’s – the author of many of Faith and my favorite books: The Susan Henshaw mystery series and the one featuring Josie Pigeon. Slice a large piece of cake and settle down with, say, Murder at the PTA Luncheon or This Old Murder, or Death in Duplicate, or…”

Ingredients:

  • 2 ½ cups sifted all-purpose flour
  • 2 teaspoons baking powder
  • 1 teaspoon baking soda
  • ½ teaspoon salt
  • 2 sticks unsalted butter, room temperature
  • 1 cup sugar
  • 2 large eggs
  • 1 cup buttermilk
  • Finely grated zest of 1 lemon
  • Finely grated zest of 2 oranges
  • 1 cup chopped walnuts
  • Optional (Nancy) – ¼ teaspoon rum extract

Glaze ingredients:

  • 3 tablespoons fresh lemon juice (from lemon grated for zest)
  • ½ cup fresh orange juice (from oranges grated for zest)
  • 1 cup sugar
  • 5 tablespoons dark rum
  • Optional (Nancy) – powdered sugar to sift over finished cake

Directions:

  1. Preheat the oven to 350 degrees.
  2. Grease and flour an 8-cup Kugelhopf or Bundt pan.
  3. Sift together the flour, baking powder, baking soda, and salt, and set aside.
  4. Beat the butter in an electric mixer until soft. Add the sugar and beat to mix. Add the eggs one at a time, beating after each addition.
  5. On low speed, add the sifted dry ingredients in three additions, alternating with buttermilk, scraping bowl as necessary.   Beat in optional rum extract.
  6. Remove from the mixer and stir in the zest and nuts.
  7. Pour into the prepared pan, smooth top, and place in the hot oven. Bake for 55-60 minutes, until top springs back when pressed lightly.
  8. Remove from the oven and set on a rack.
  9. Immediately prepare the glaze.
  10. Place the juices and sugar in a saucepan over moderate heat and stir with a wooden spoon until the sugar is dissolved and the mixture comes to a boil.
  11. Remove from heat, add the rum, and stir.
  12. Pierce the top of the cake with a cake tester (I did it about every ½ inch – Nancy)
  13. Spoon the hot glaze over the hot cake (still in the pan), spooning a little at a time. When you notice glaze oozing around the edge of the cake pan, use a metal spatula or knife to ease the edge of the cake away from the pan, allowing the glaze to run down the sides.
  14. Continue this until all the glaze is absorbed. It will be absorbed, believe me.
  15. Let the cake stand for 10 to 15 minutes, until the bottom of the pan is cool enough to touch.
  16. Cover the cake with a plate, hold the plate tightly in place against the cake pan, and flip over the cake and pan.
  17. Remove the cake pan from the cake. Let stand for at least two hours until cool, and cover with plastic wrap. Can stand overnight before serving.

Older Posts »

Categories